A protoplanetary disk is, in my opinion, a stupid word that means something very sweet … it just means a solar system in its infancy, when it’s still a baby, still developing. But instead of just calling it a “baby solar system” or, to be more regal, an “infant solar system”, they had to christen it with an ugly, long, totally unnecessary name. It makes it sound like a super foreign, enormously complex idea: what else could a protoplanetary disk be, if not something that you can only understand if you spend many years getting a PhD? Really, it’s a pretty straightforward, though! It’s an infant solar system. But the people getting their PhDs in this have to pretend that their research is sooooo complicated and would go over all your heads, and therefore … we’re stuck with a “protoplanetary disk”.
I should make one more note: I said a protoplanetary disk is “sweet”. It’s sweet because it’s a baby in a sense. But they’re not actually all that sweet. They’re like violent places full of collisions.
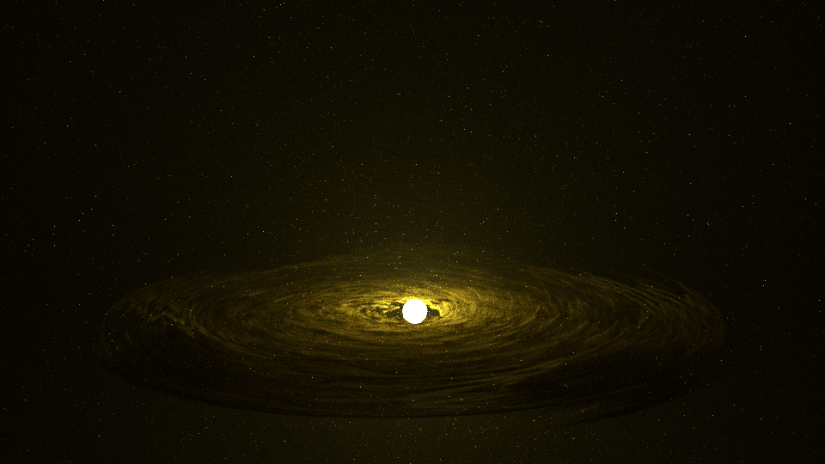
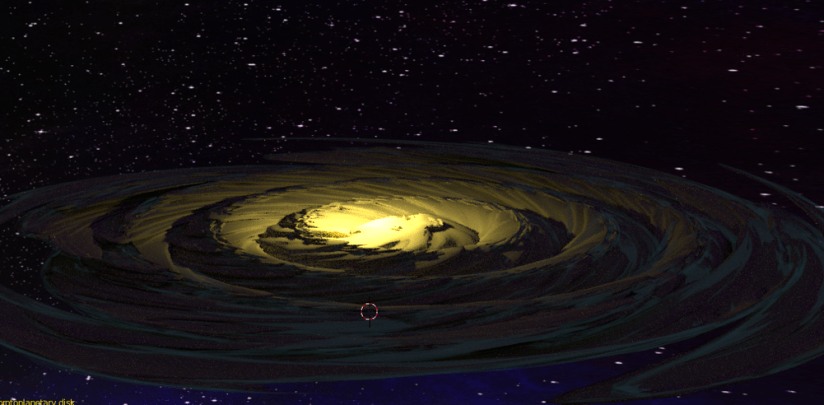
Any case, I made one in Blender 3D. This right here was the image I tried to mimic. And this is what mine ended up looking like:
Isn’t it nice??!! You can see it spinning in animated form here.
The spinning might be a little fast.
I made this 3D model on my own. I mean, there’s not tutorial out there titled, “How to build a protoplanetary disk in Blender”. So I had to skulk around in several different tutorials and get tips from each to figure out how I was going to do this. One of the few times I’ve completely improvised my Blender work when it comes to a more complicated object. Makes me proud when I experiment and do this. One tutorial in particular that got me started on some ideas was this one on making clouds.
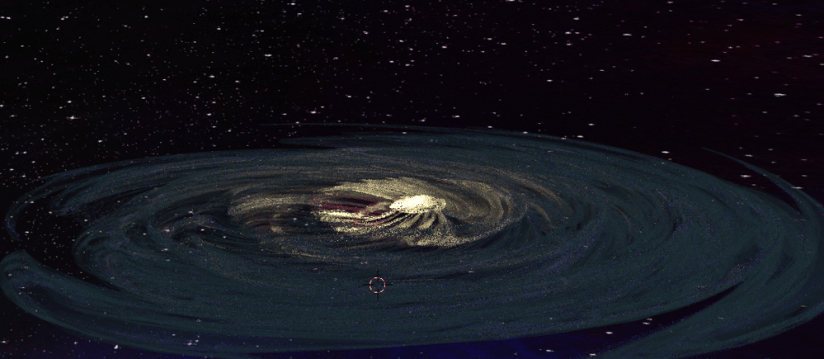
Once I got the basic shape, this is what it looked like:
It’s got the concentric circles, but it’s a bit too solid.
So I changed the material a bit, tried to make it transparent, and …
This made the disk look a little more insubstantial, which is what I wanted. On the other hand, it made it look like there was a stump in the middle. There was actually no stump there, but this particular material, combined with the light source, produced the aspect of one.
So I finally just cut out some of the vertices in the center of the disk. And also, I changed the way I was setting up the light source. At first, I had set up a sun lamp right over the disk, and let it shine down onto the center. But once I carved out the hole in the disk, I got rid of the sun lamp; added an icosphere in the gap left by the hole; gave it an emission shader; and then amped up the strength a whole bunch.
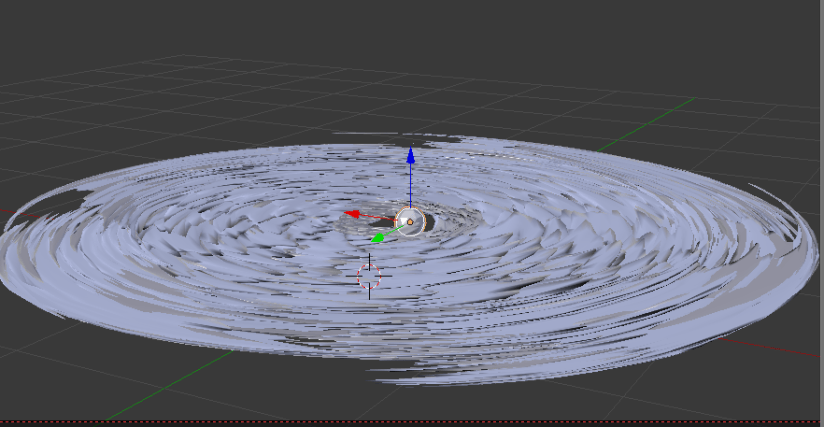
So again, it ended up looking like this:
This is how I got there:
Objects
First, this is what the model looks like in Blender: you can see both the disk and the “sun” in the center.
Modifiers:
The disk is just a plane, extruded upwards a bit, with several modifiers on it. Here you see all of them:
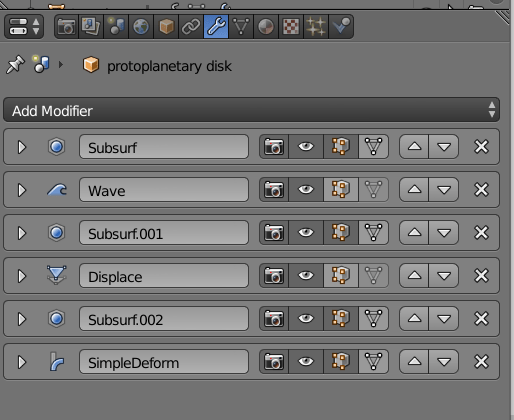
I added a subsurface modifier between all the others not because I knew what I was doing, but because I saw someone do that in a tutorial. So it seemed like an impressive thing to do.
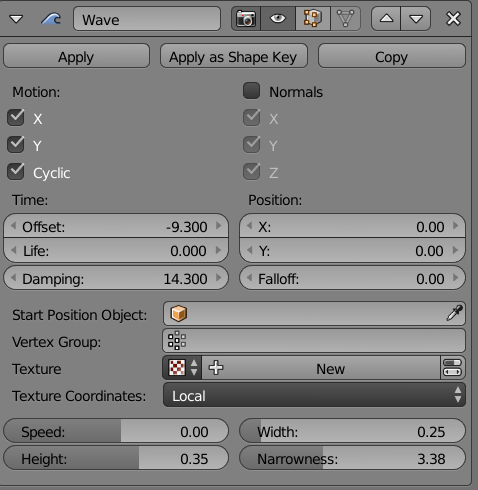
Here’s what the parameters of the wave modifier look like:
Here is the Displace modifier parameters, along with the linked texture:


And finally the Simple deform modifier. This one was super fun! I tried out the Bend, Twist, Taper, and Stretch options, each in its turn, and it was so cool to see the results.

Lighting
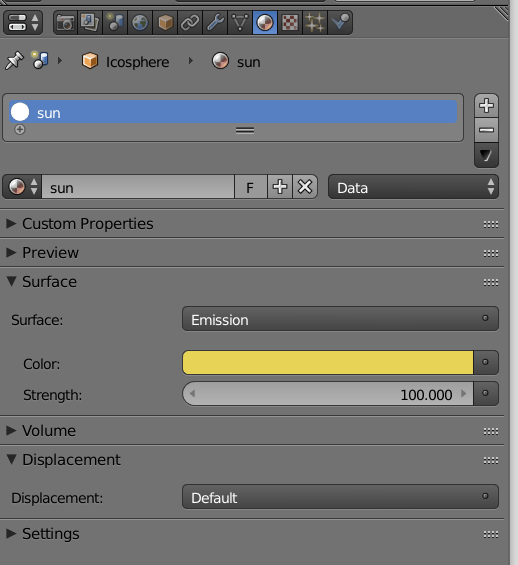
Like I said, I added an icosphere to put in the middle of the disk, and then this is the material I assigned it. Simple and straightforward: an emission shader, a yellow color, and a high strength of 100. I deleted all the other lights.
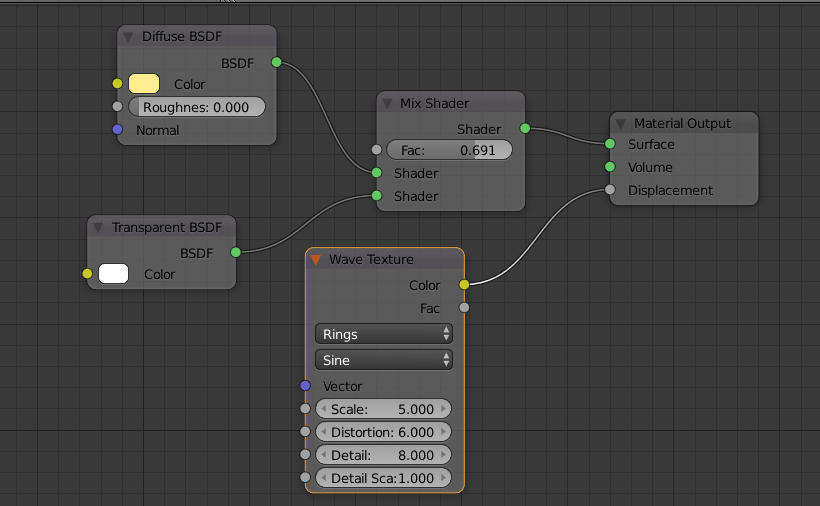
Disk material
The material to color the disk did not end up so complicated at all. Here are the nodes:
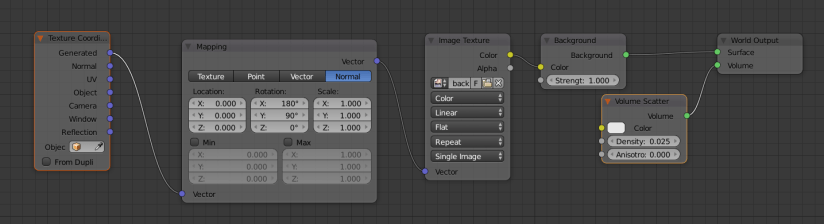
World material
For the world material, I used a background image:
The background image I used is located in the description provided for this YouTube tutorial. That particular YouTube tutorial is what I used to make the first animation in this Twitter thread.
Animate the disk
To make the disk spin, there’s two things you need to do.
- First, go to the wave modifier and make sure the speed is set to 0. Otherwise, the disk will spin all by itself, and no matter if I turned the speed up or down, it was rotating way too fast.
- Now you can manually animate the disk by adding keyframes. Save the position at the beginning of the animation, and then go forwards on the timeline, spin the disk however much you want (press R-shift-z; the shift-z will make sure the “R” for rotate doesn’t cause the disk to wobble up and down), and then keyframe the new position.
And that’s it! My approach to making a protoplanetary disk in Blender.
