I figured this out on my own!
This is a manual solution.
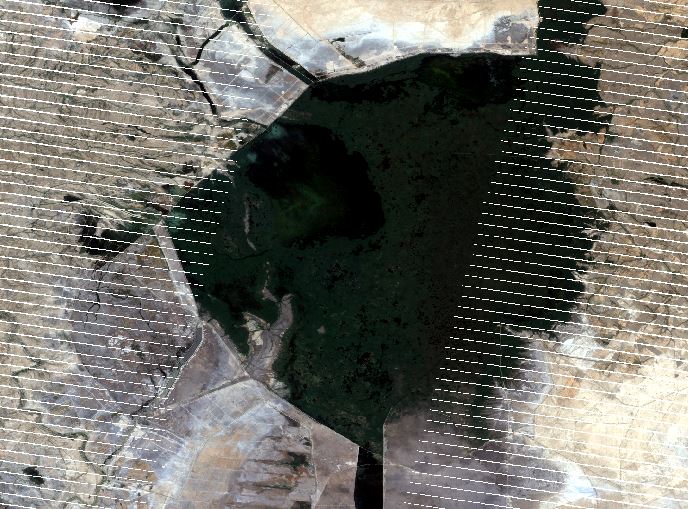
So first, you have a raster file as follows: (in my case, I downloaded it from Google Earth Engine).
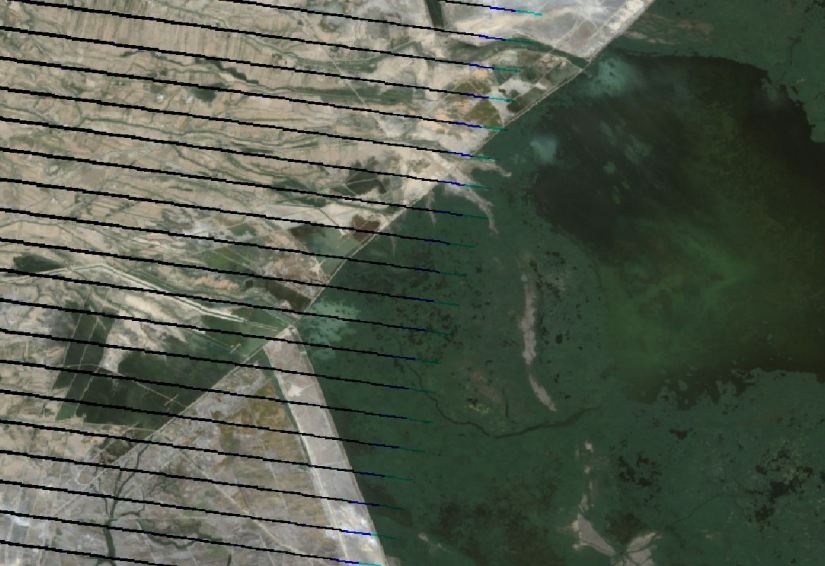
Those black stripes are from when the satellite that took the picture of this place (Landsat #7) broke. It broke four years after it was launched. Poor thing. And yet it is still up there in the heavens, orbiting Earth, and faithfully taking images of us from above. It’s been over 20 years now!
And you can see that most of the image is okay, just the black stripes are no good. And actually, the further out you get to the edges of the image, even the colored pixels have faulty distortions in them.
Any case, though, I wanna get rid of the black stripes so the image can look a little prettier.
First, click on the Identify tool in the QGIS tool bar (circle 1). Once you’ve clicked on the Identify tool, you can click anywhere on the image, and it will tell you what value the pixel you’re clicking on has. So click on the black stripes (zoom in so you click exactly on the stripe) — this is circle 2 — and then you will see in a left-hand pane what the value is (circle 3). As you can see, for the black stripes, the values are coded as nan. NAN stands for “not a number”, scientists and computer people always use very technical terms, you see.
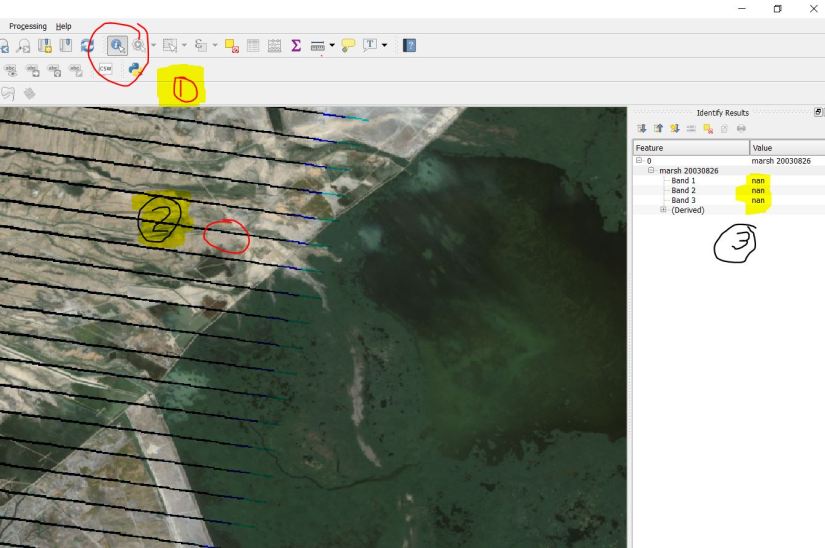
Well, since the black stripes are coded as “nan”, we should be able to easily isolate them, and get rid of them! And it was easy, once you find out how, and this is how to do it:
Go to the menu bar >> click the “Raster” pull-down menu >> click “Extraction” >> click “Clipper”.
You’ll get this nice pop-up box. And there’s four easy steps to getting it to do what you want:
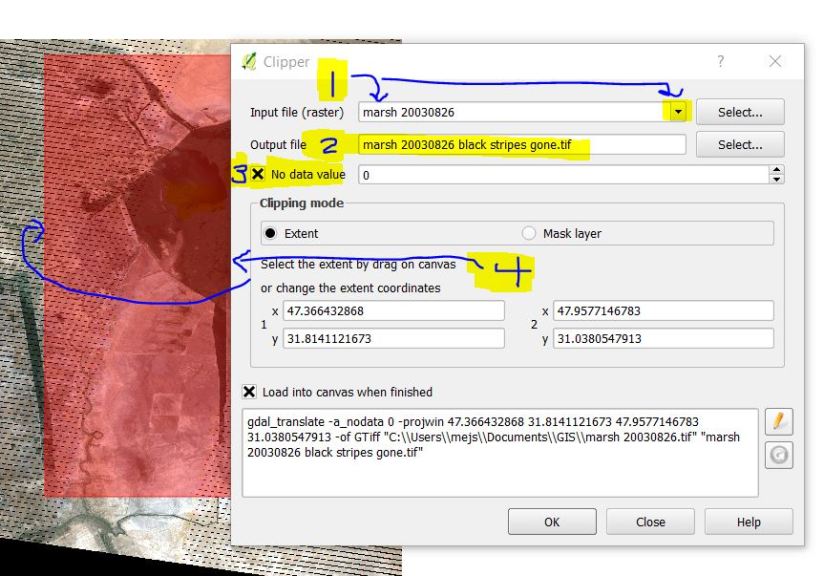
Step 1: use the pull-down arrow to pick the correct raster file with black stripes that you’re trying to fix.
Step 2: When it gets fixed, it’s going to create a whole new file with the corrections. So give a name to this new file.
Step 3: Click the box next to “No data value”. And then I’m not entirely sure what the story of the “0” is next to that — you can choose any number. I left it at 0.
Step 4: Last step, it won’t let you press “ok” unless you first specify what section of the image you want fixed. You can very easily zoom your image behind the pop-up box the way you want it, and then just click and create the reddish box. And that will be the “extent”. The coordinates in the x and y boxes will populate automatically.
Then you press okay!
And, gentle folk, you see the result. The new raster file that’s created will automatically pop up, and look! White stripes instead of black. Except they’re not really white. They’re transparent. Which means you can add another image underneath to fill in, or do whatever you want to soften the look of the stripes.
Ta-da! The end.
